Always in the upgrade cycle it seems.
A popular case that my friends like to use is the Apevia X-QPack uATX line and we have built many of these. So I will be working with this case and upgrading a prebuilt system that was completed months ago.
Apevia makes three lines of the uATX series, the X-Qpack, X-Qpack2 and X-Qboii which is a uATX tower.
You can see that they come in a wide range of colors too pick from.
http://www.apevia.com/Products_Level...&CID2=2&CID3=0
http://www.apevia.com/Products_Level...&CID2=2&CID3=1
http://www.apevia.com/Products_Level...&CID2=2&CID3=2
The unit I will be rebuilding is based on the X-Qpack, but I also have a new X-Qpack2 here that I will show later on.

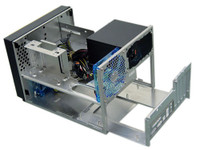
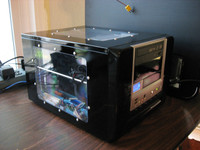
You can see that they come with a slide out motherboard tray and come with a Power Supply installed which is generally powerful enough to handle most builds that would go in one of these cases. Packaging and quality of the case construction is pretty high, all though the sheet metal used is a little soft and can be bent rather easy.
Here are a few pictures of the new X-Qpack2 I have here.


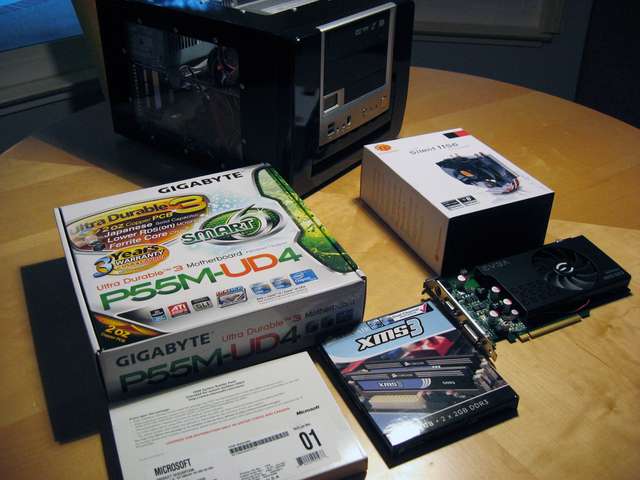
Parts list for this build will be:
Gigabyte P55M-UD4 uATX mother board
Intel Core I7 860
Corsair XMS3 4gig 1600 9-9-9-24
EVGA 9600 GSO 512 graphics card
Thermaltake Silent 1156 CPU cooler
Parts to be reused are
2x 1TB WD Green series HDs
1 Sony DRU-820A DVD drive
The old power supply was a Antec 350watt
Requirements for this build is it will be used as a work computer so no high end graphics cards used, it must make as little noise as possible, and be able to play HD movies from time to time. This will be your general purpose web surfing, and office application build.
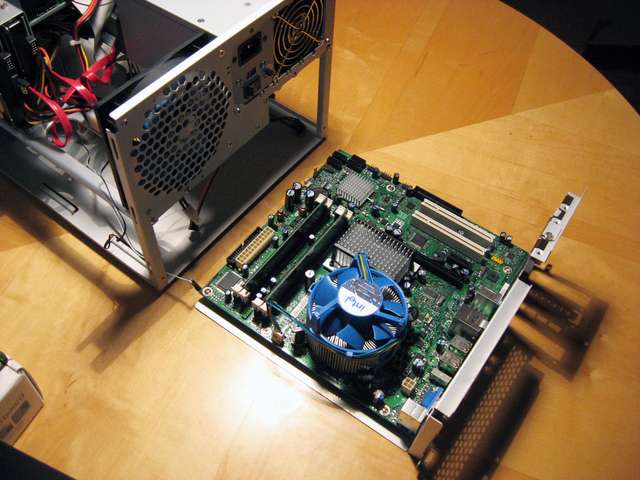
So starting off with the rebuild I took out the old motherboard which was a cheap Intel MB and we used an older QX6700 CPU that I had laying around. The CPU was pretty much a waste for this build but it was what I had on hand at the time when I built this months ago.
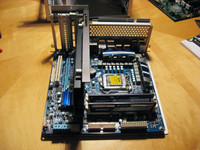
So I begin by take taking out the old mother board
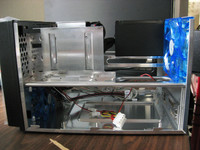
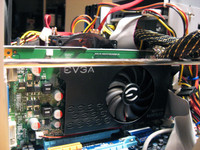
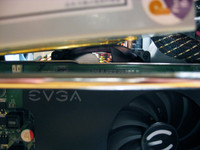
And now installing the Gigabyte P55M-UD4, RAM and Graphics Card
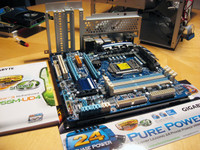
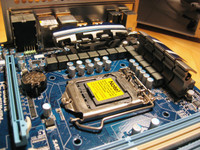

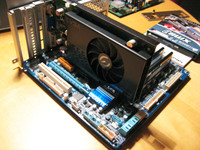

Its a pretty tight fit but it all goes in. I had to remove the top plate on the GPU to provide enough clearance for everything to slide in.
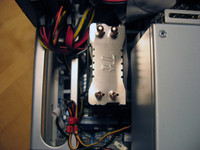
Now time to install the heat sink. This was to be a real challenge to get this to fit in the case as it is rather tall for a build in this case, so lets see how everything came together.
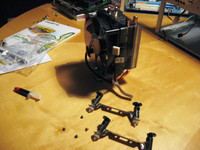

Compared to a large Mega Shadow


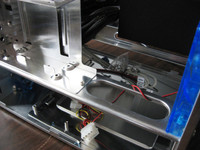
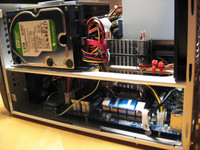
Down inside you can see there is not much room

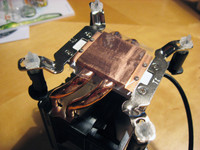
But now I had another problem, the fan housing on the heat sink was too high and interfered with the power supply placement.

The heat sink could not be rotated 180 degrees as then the heat pipes on the heat sink would interfere again with the power supply. So what I ended up doing was to take of the fan housing which was a simple bracket, lower the fan and use a good old zip tie to hold the fan in place. It did not have to be lowered a whole lot and should still provide enough air flow into the heat sink to keep things cool as this build was not going to have a high over clock on it so all should be good.

Another problem came up again, this time with the old power supply. At first I was unsure what the problem was, I would fire up the computer and it would start and even get a ways into the boot up then shut off. At first I thought that I had not seated the heat sink on correctly and the CPU was over heating forcing a shut down. So with great pain I removed the heat sink and reseated the CPU, then the heat sink and tried again, believe me that taking off the heat sink was no easy task as there is very little room to reach in and turn the hold down screws. But the same problem happened again and again.
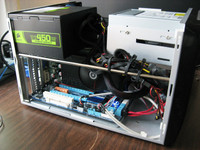
So now thinking that the power supply was the problem I removed the old Antec unit and plugged in my benching PSU and everything worked fine. As luck would have it we had a bran new Corsair 450watt unit that was a perfect fit, in fact it fit better as it was not so long. Now the machine was up and running fine.
The OS to be installed was a OEM Win 7 32bit and as usual that went very fast and no need for driver install as Win 7 takes care of that just fine. I really do like Win 7 for its fast install and no need for driver disks anymore. The only driver needed was for the EVGA 9600 GSO which I downloaded from Nvidias website and install, no reboot needed and bingo a full system up and running in about 15 minutes.
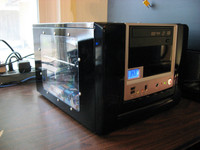

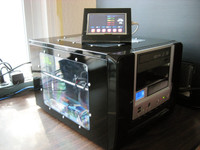
Another gadget that I show here is our ZombieTek LCD display. You can check out the blog I did on this over at
http://www.techreaction.net/


Now I began tuning the over clock and making sure that everything would work fine with no issues. One of the possible problems with builds like this and cramming so much inside the small case is heat issues. What I do is decided on a moderate over clock and see how the unit performs running Prime95. These cases do tend to run a little warmer than big tower cases so care must be taken that a good solid running system is setup so I dont get a call later on
Hey Bill this units keeps shutting down, whats up ??

I ended up with a 3.0ghz OC which was not much more than a stock setup but temps became an issue if went to 3.2ghz. Normal use the 3.2ghz OC would have been fine as Prime95 stresses the machine far more than what I would expect this user to ever do, but I prefer to keep some safety margins in my builds so I backed down the over clock to a safer level. One of the things I really like about the Gigabyte P55M-UD4 and I7 860 is that you can under volt the CPU and still be very stable, stock setting was 1.256 vcore and I was able to drop that to 1.150vcore and give it a slight over clock and still be very stable and lower power usage.
So at 3.0ghz and 1.150vcore I ran Prime95 for over a day and everything was fine, temps were a bit warmer than I would like but ended up at about 60c with it being stress with Prime, normal temps were high 30's to 40 which is not bad considering all the stuff crammed inside this small case.
Full well knowing that this was not a benching rig I ran a few benches just for grins.
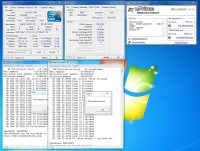


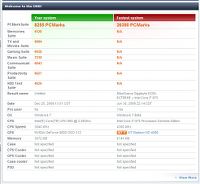
And the final over clock

So doing a uATX build in a small case can be a real challenge when deciding on hardware to install. The X-Qpack is a great case to build on as it has small size, takes up little desk space and makes for a great work station. Using the new I7 line of CPUs can be a problem though with 4 cores and 8 threads all firing away they tend to get pretty warm. When I ran this CPU at a 3.4ghz OC and Prime temps would get to the 80s which is rather warm, even at this temp range it Primed for over 4 hours nice and stable, but this is clearly to warm. Backing down the OC for a work station that will not be doing any gaming or demanding applications is a wise thing to do so no problems pop up later on, even in the 60s range I feel its a bit to warm but knowing that this machine will never be stressed like this I feel its ok. Maybe a better heat sink might be used and if so we can mod that in later on, but for now I think this one will work fine.
Gigabyte mother boards come with great power saving features which is one of the main reasons I like these mother boards, and they have high quality construction, run very stable, and the ones I have tested and used just simply do not have any problems. They come loaded with features which make them a great value for a mother board.
I have also built many of the X-Qpack case builds and really enjoy building a computer based on these cases. They look really nice and provide a nice small package that works well with many builds.
Here is a WHS I built on one of these cases, packed with an old AMD 4200+ CPU and 4x WD 750gb hard disks. This unit can be shoved out of the way and it just keeps on ticking.

Hope you enjoy reading about this build